How to Launch your Squarespace Website + Checklist
Hooray! You’re on the brink of launching your Squarespace website.
Hold up. You’re almost there - just a couple of extra steps to ensure your new website kicks off with the best possible start.
After you've followed our design tutorials and are beaming with joy over how your Squarespace website looks, here’s what you need to do to hit publish and make it go live.
Ready, set, launch: Squarespace website launch checklist
1. Put the last touches on your Squarespace website
Just in case you haven’t yet, be sure to:
1. Set your site title and add a logo
Here’s how to do this:
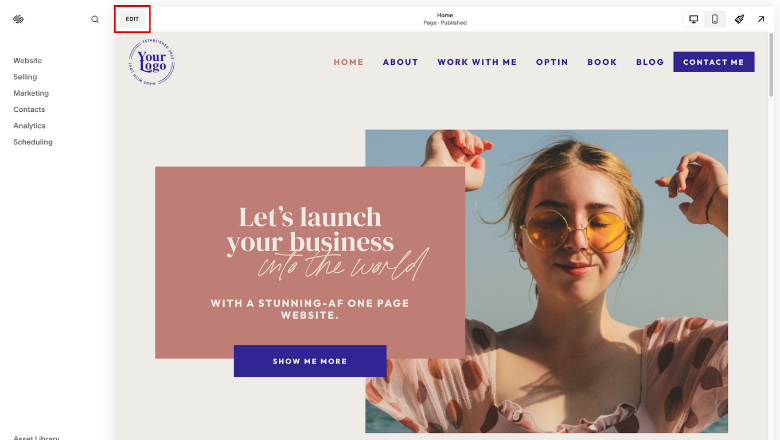
Click the Edit button in the top-left corner of your Squarespace site preview.
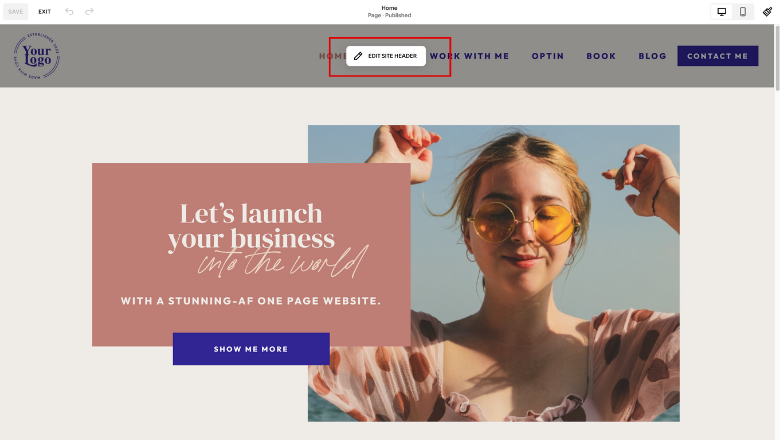
Hover your mouse over the top of your page and click ‘Edit Site Header’.
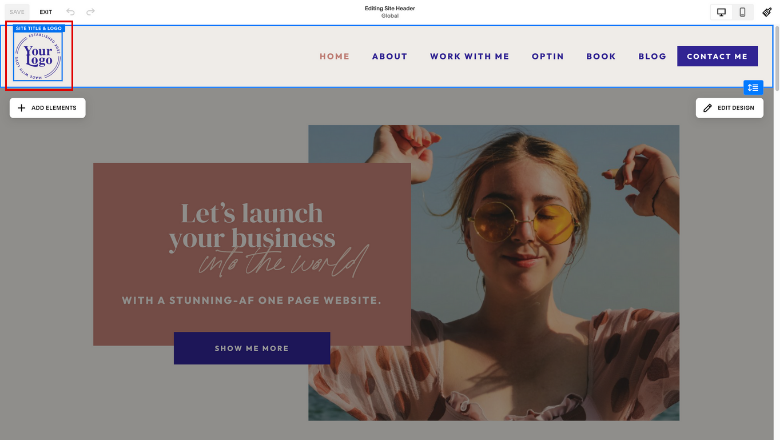
Click ‘Site Title & Logo’, then click the pencil icon to edit it.
In the ‘Site Title’ text field, type in your site title. Ideally, aim to keep this title under 60 characters and include one or more keywords.
Under ‘Logo Image’, select ‘Replace’ to add your site logo.
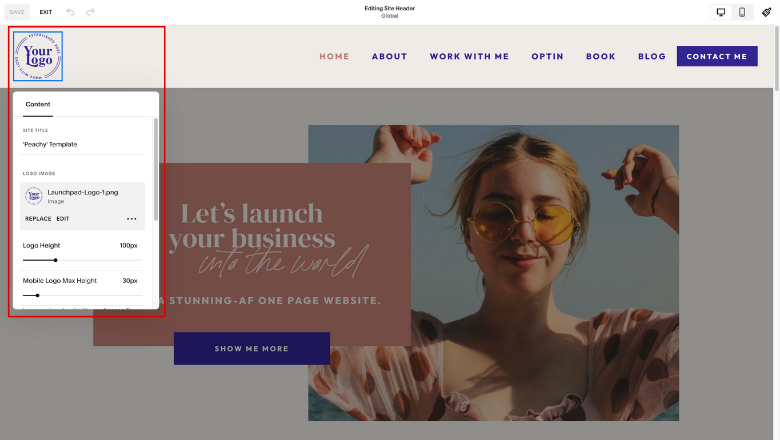
Even though adding a site logo replaces your site title in the graphic, it’s still worth adding a custom site title via this panel, as this will be indexed by search engines and appear in search results.
2. Add a cookie banner
Mmm, cookies. To display a cookie banner:
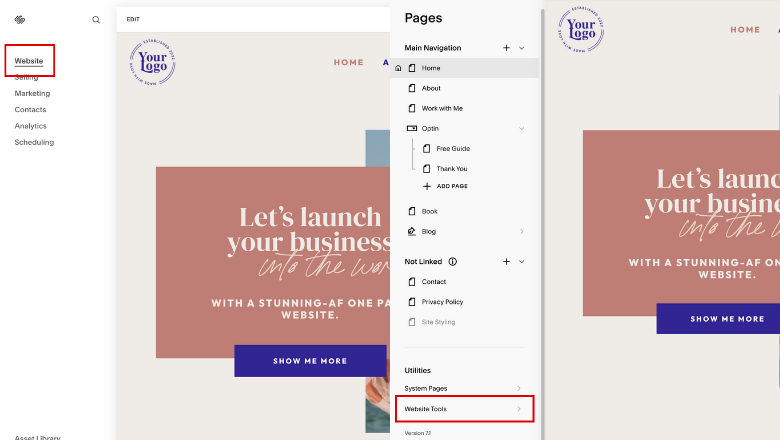
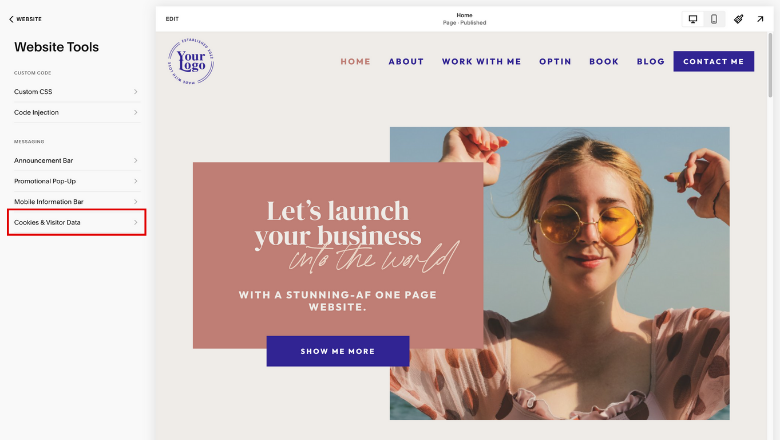
Open the ‘Cookies & Visitor Data’ panel in your Squarespace Settings.
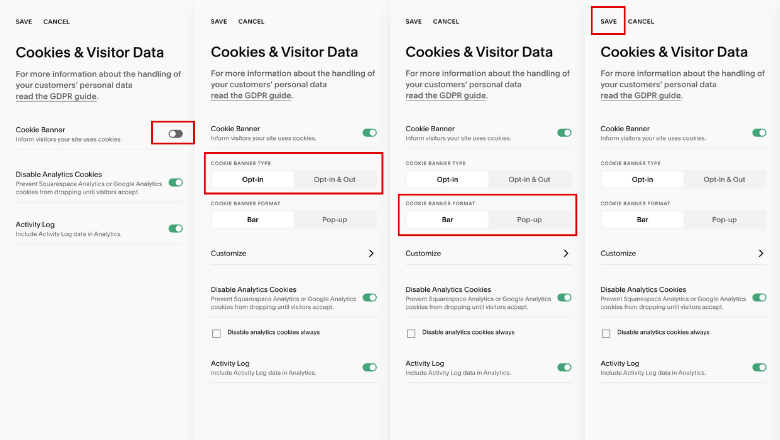
Switch on the toggle beside ‘Cookie banner’.
Choose the cookie banner type. ‘Opt-in’ displays a customisable button for visitors to accept your site’s cookies. ‘Opt-in & out’ displays two customisable buttons for customers to accept or decline your website’s cookies.
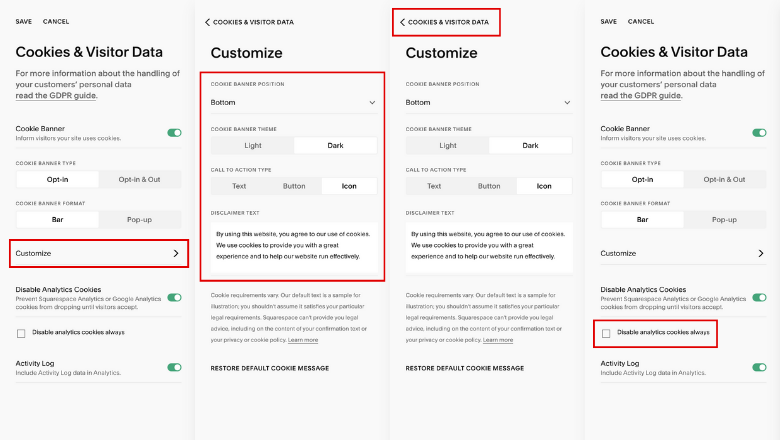
Choose your cookie banner format. Click the options to display a preview. Click ‘Save’, then click ‘Customise’ to edit the banner theme, call to action, and text.
Choose whether to restrict analytics cookies.
Consider adding a privacy policy and make sure it’s easy to find.
3. Add a custom favicon
A favicon is the cute little image that shows up in your website visitors’ browser tab and search results.
To add a custom favicon to your site (well worth it if you want to stand out):
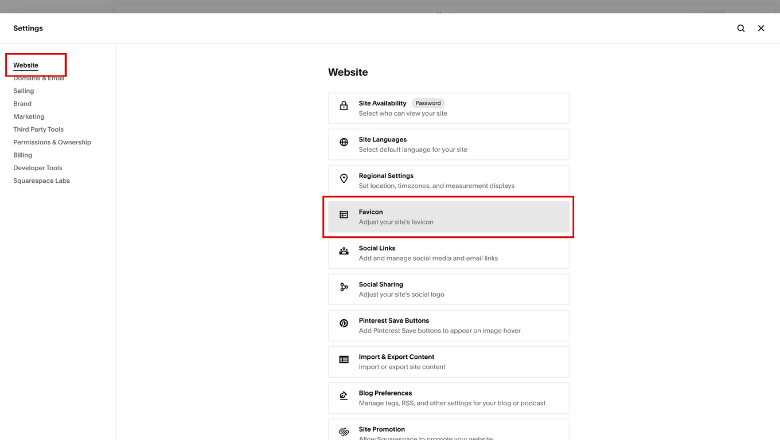
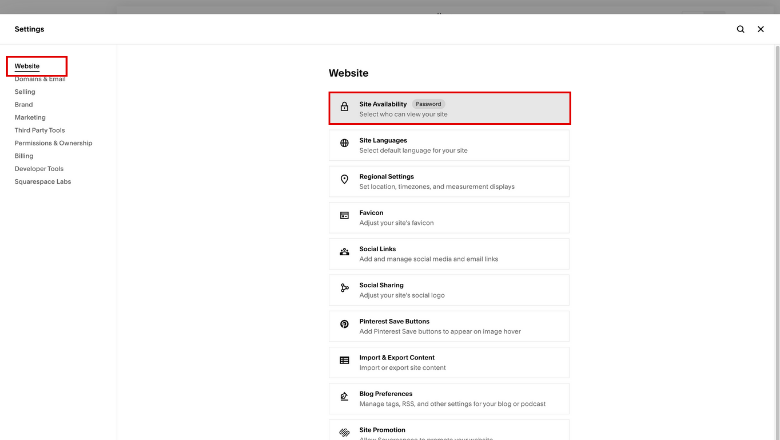
Go to ‘Settings’.
Navigate to ‘Website’
Click ‘Favicon’.
Upload your favicon

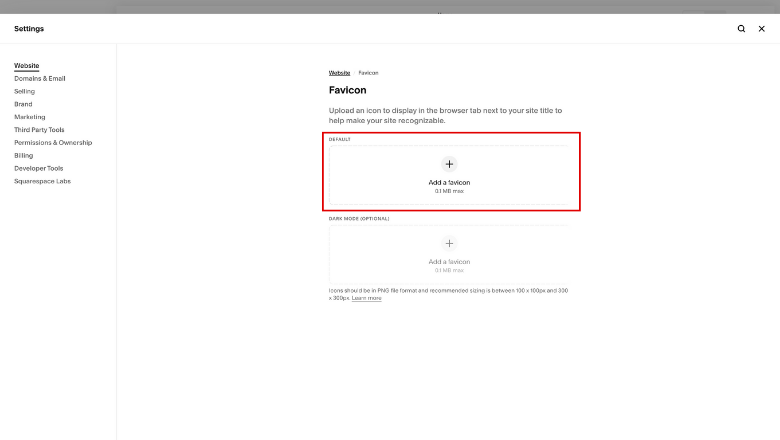
Favicon images work best across all browsers when they’re:
100px x 100px
300px × 300px
They can display at 16px × 16px, but this will appear more grainy than the other favicon sizes.
2. Finalise your pages
1. Add extra pages for credibility: Consider if there are pages your visitors will be looking for that you haven't yet created. For example, an About or Contact page.
2. Organise your navigation bar: Reorder the items in your navigation menu to improve your website visitors’ journey. To move these, simply drag and drop them around the Pages panel.
3. Set up a custom 404 error page: Customise your 404 page to match your brand with links to popular or important areas of your site. This will help to guide visitors who end up in the wrong place, help them find what they’re looking for and encourage people to stay on your website.
4. Check URL slugs for all pages: If you’ve changed any page titles, you may want to edit the slugs to match. It’s best to have URLs that reflect the content of the page. If you save a blog post, product, or event before adding a title, the URL slug will be a random string of characters. Check the slugs for each page and item on your site, and change any that don't use real words.
5. Edit and proofread your website copy: Read through the text on every page at least once. Check for typos, broken links, and placeholder text from demo content.
6. Double-check your mobile layout using Fluid Engine: If you’ve purchased a Squarespace template through us, we’ve already optimised your website template for you! But it’s worth double checking the mobile view of your website just in case adding in your website copy has rejigged the template layout.
3. Check images
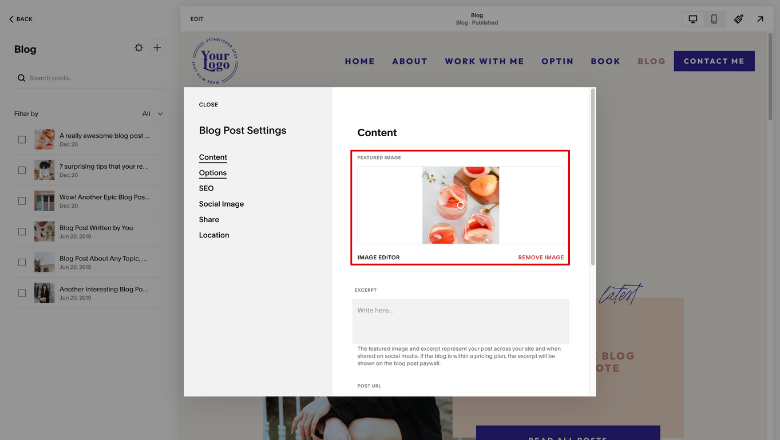
1. Set up Banner and Featured Images: Check that all pages have Banner Images (if you’re using version 7.1+) and Featured Images (if you’re using version 7.0 or below). Squarespace makes it easy to add Featured Images to collection items like blogs, portfolios, events and products. We recommend adding these whenever the option is available to improve the visual experience of your Squarespace website.

2. Check image links: If you’ve turned any images into links, click them to check they take you to the correct place. Replace incorrect links with the correct ones.
3. Check the quality of uploaded images: If an image looks fuzzy, check that it follows Squarespace’s image formatting best practices. Use Squarespace’s image editor to make updates.
4. Register and connect your custom domain name
You may have already done this. If you have, skip ahead!
Registering your domain name is basically setting up your website URL (e.g. www.yourdomainname.com).
If you’re using Squarespace as your hosting platform (which is likely if you’re reading this!), it’s probably easiest to register your domain name with Squarespace too.
Using a custom domain (rather than the built-in .squarespace.com URL) strengthens your brand and makes it easier for potential customers to find you in search results.
If your provider offers access to DNS settings, you can connect any third party domain to your Squarespace site.
Other popular places to buy your domain name include:
GoDaddy
NameCheap
Google Workspace
Google Domains
When you set up your domain, you can use your domain name service to register an official email address that matches your website domain.
Check out this list of other integrations that Squarespace supports.
5. Optimise for search engines
Before publishing your site…
1. Add a meta description to all pages of your website
A meta description is a short (155-166 character) piece of text that entices people to click through in the search results. This meta description may appear below your site title in search results, depending on what your visitors are searching for.
To control how your meta descriptions appear in search results, edit these fields:
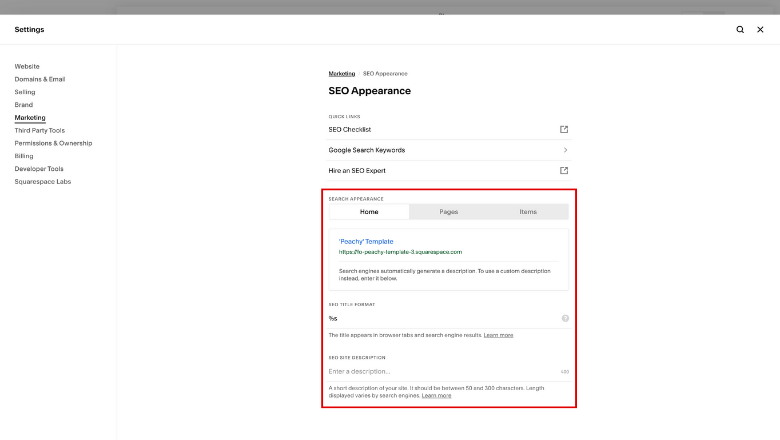
SEO site description - Represents your homepage.
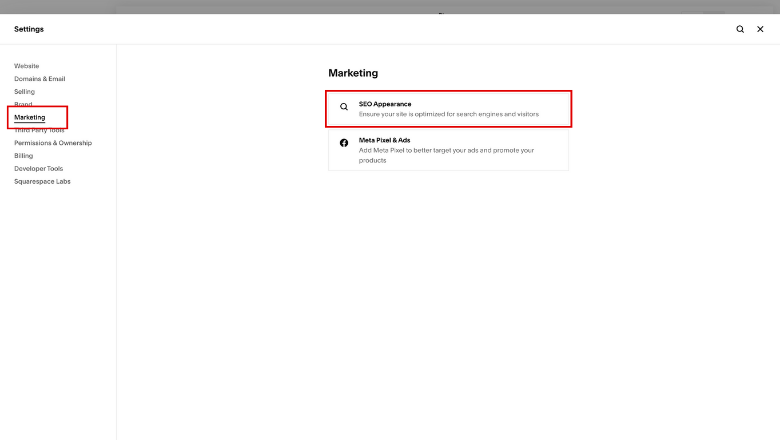
Open the SEO appearance panel.
In the Search appearance area, click the Home tab.
Edit the SEO site description field, then click Save.
SEO description - Represents individual pages or collection items, like products and blog posts

To add an SEO description for a collection item:
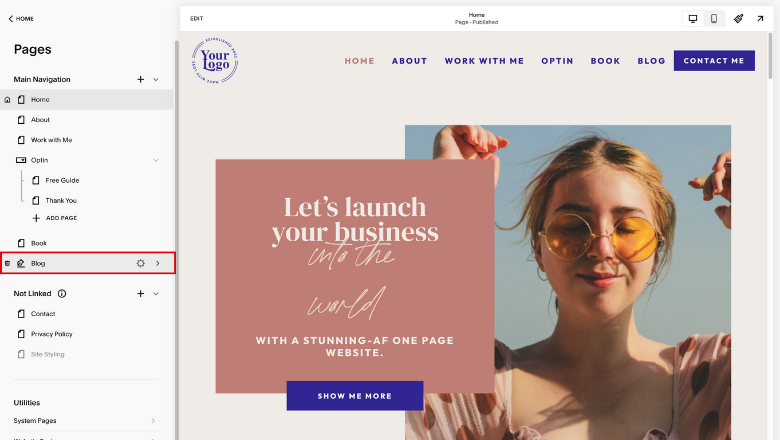
Open the Pages panel.
Click a blog page, store page, events page, or portfolio page.
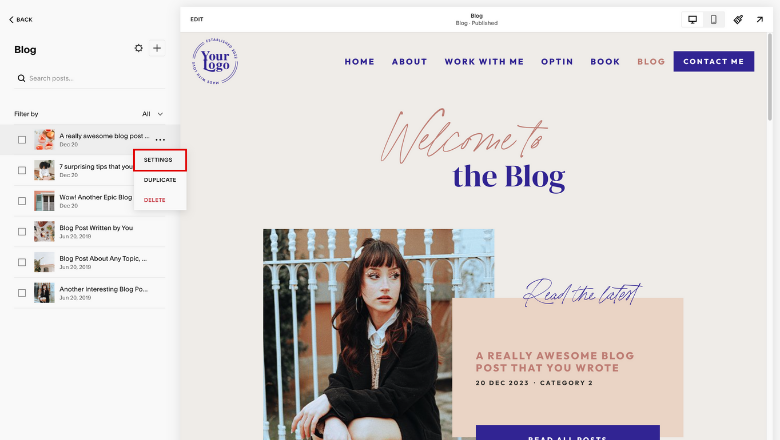
For blog posts and events, hover over the item and click Edit. If your site is on version 7.1, click the-gear-icon in the top-right corner after clicking Edit.
For products, double-click the product.
For portfolio sub-pages, click ..., then click Settings.
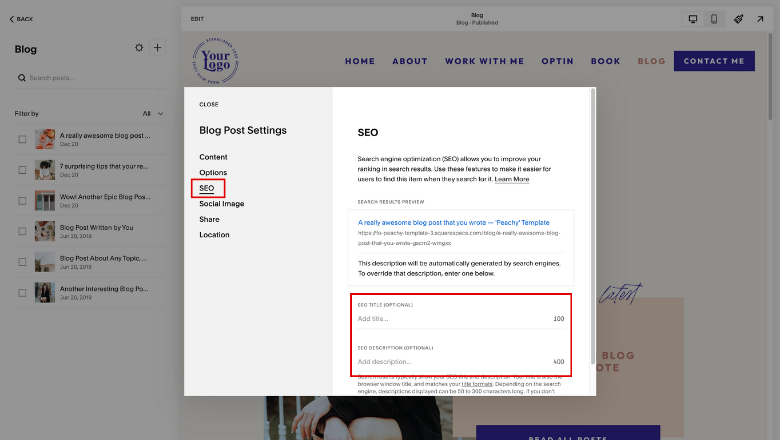
Click the SEO tab, then enter your description in the SEO Description field.
Click Save.
2. Check your page and title formats
Check and update how your official page titles appear in browser tabs, social shares, and search engine results.
You can set your page titles for both your homepage and individual blog posts. To do this:
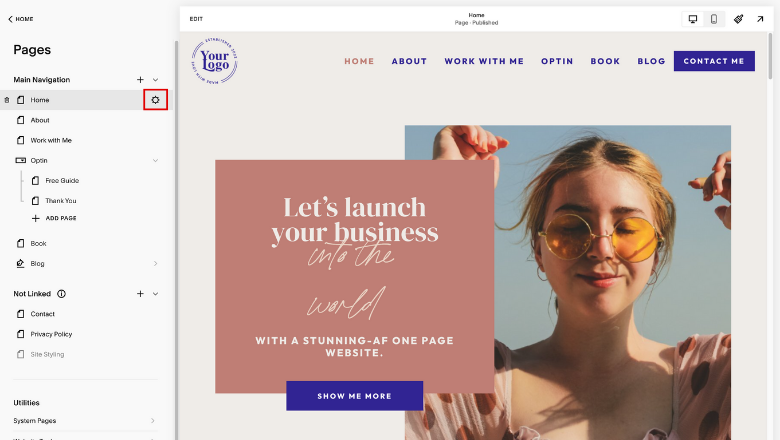
From the Home Menu, click Pages.
Hover over the Page Title.
Click the gear icon next to the title.
Enter a new title under Page Title.
Click Save.

3. Add social sharing images
To set the image that displays on social media when you or someone else shares your site:
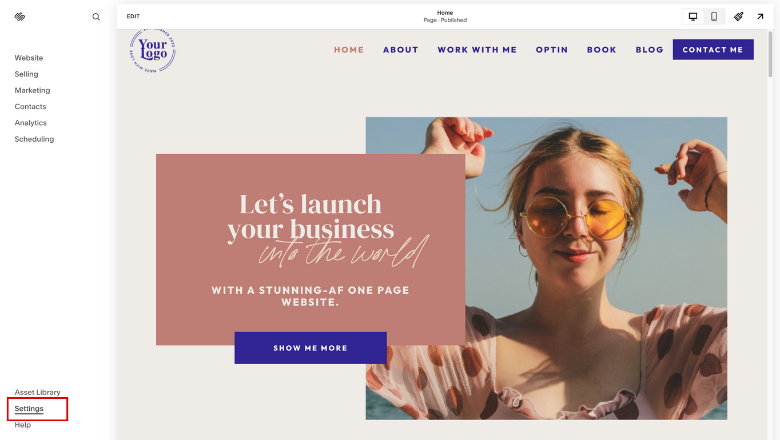
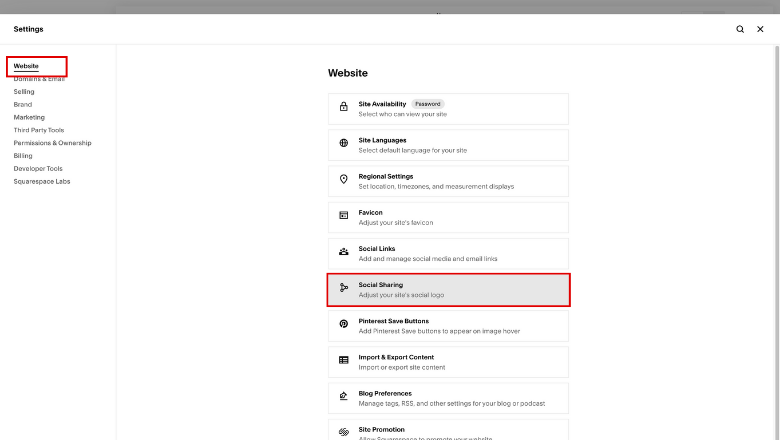
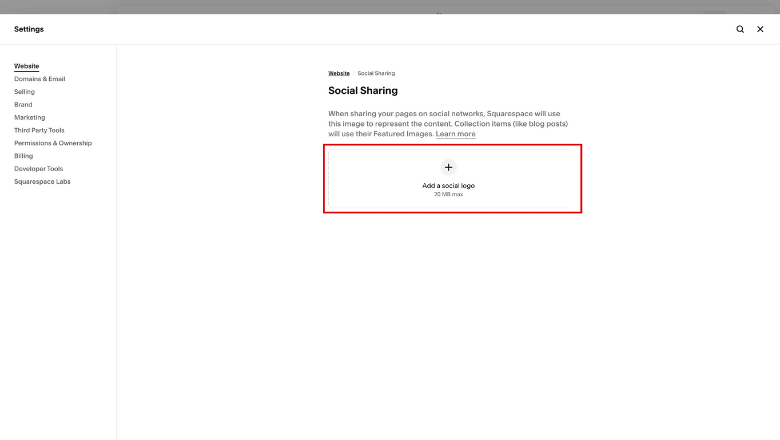
Click Settings.
Under ‘Website’, scroll down and click ‘Social Sharing’.
Set the image for your website. You can choose one image to represent your whole site, one image for each page individually, and one for each blog post.
4. Ensure SSL is enabled
All domains correctly added to your Squarespace site are automatically protected with free SSL certificates to improve security. Confirm your SSL certificate is turned to the Secure setting.
5. Publish
Ta-da! It’s time to publish your website and put it out into the world. Exciting!
To flick the switch and make your website visible to the world:
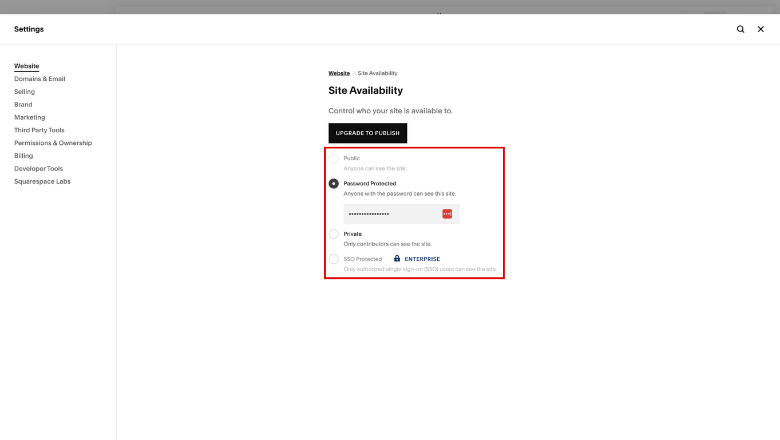
Open Squarespace’s Site Availability panel.
Select Public, Password Protected, Private, or SSO Protected.
Click Save.
After your site is live, search engines will start to index your site.

Here’s what you want to do straight after publishing your site
1. Verify your site with Google Search Console: Verify your website with Google to manage your site’s presence in Google search results and review how visitors find you.
2. Request for Google to index your site: In Google Search Console, you can ask Google's bots to review your website and update search results with your new content.
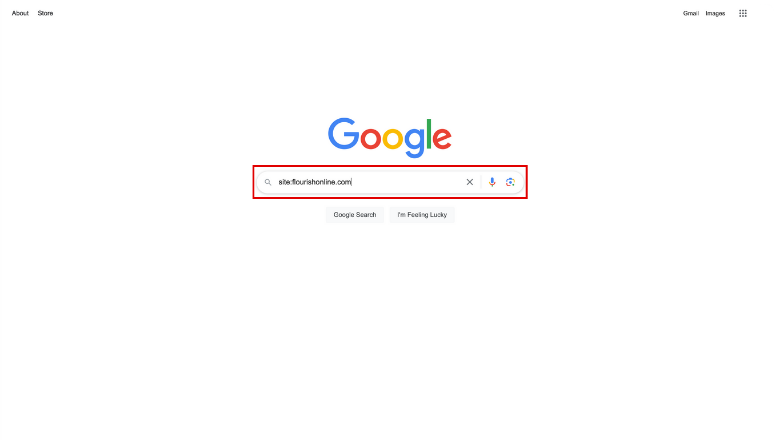
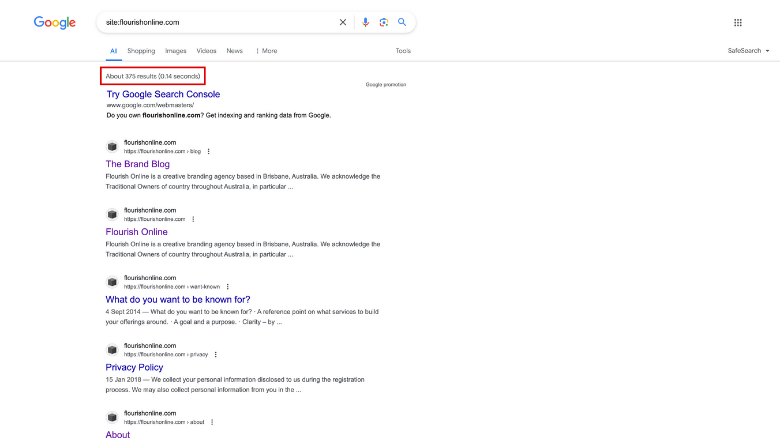
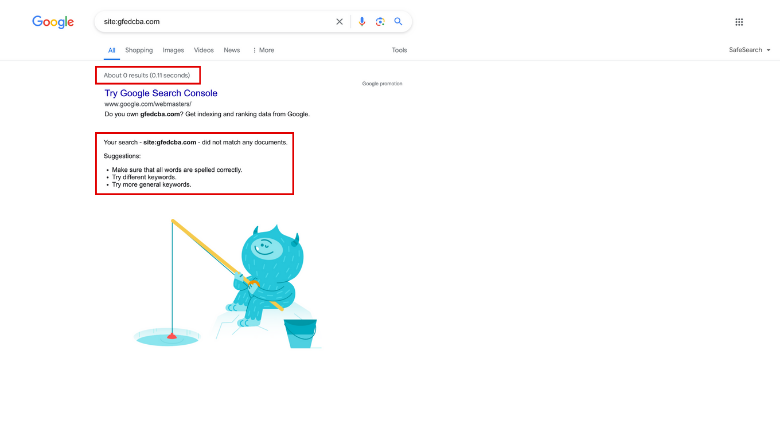
In the Google Search bar paste site:yoursite.com. And make sure to swap out yousite.com with your own website url.
If Google has indexed your site pages, they will show up within the search results.
If your site search results in no matches, follow the directions within Google Search Console.
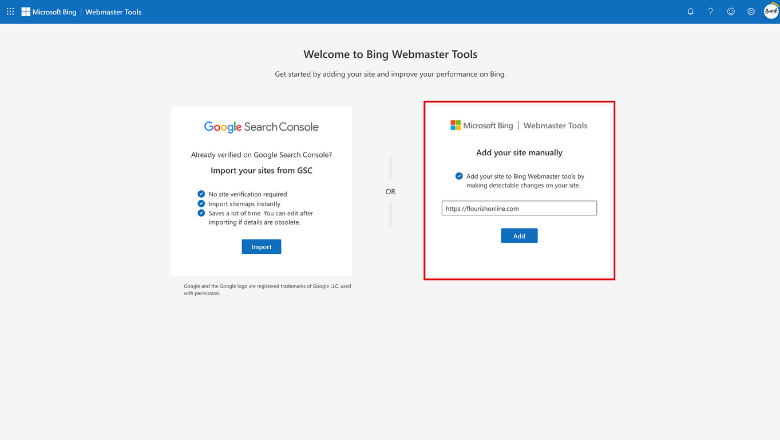
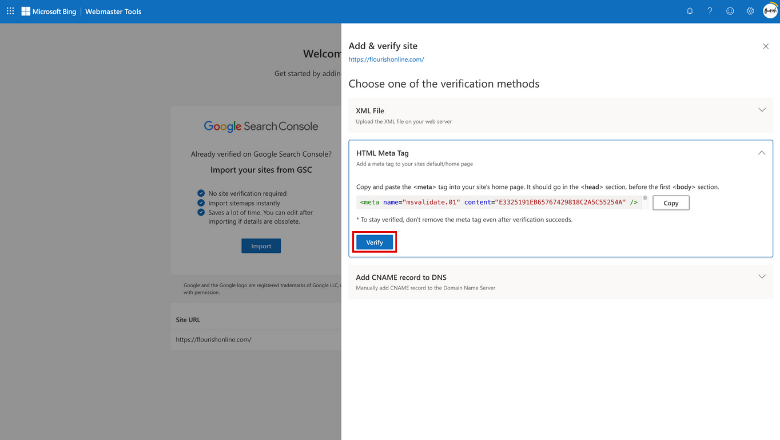
3. Verify your site with Bing Webmaster Tools: Verify your site with Bing to manage your site’s presence in Bing and Yahoo search results.
In the ‘Add your site manually’ section within the Bing Webmaster Tools dashboard, paste your site url and click Add.
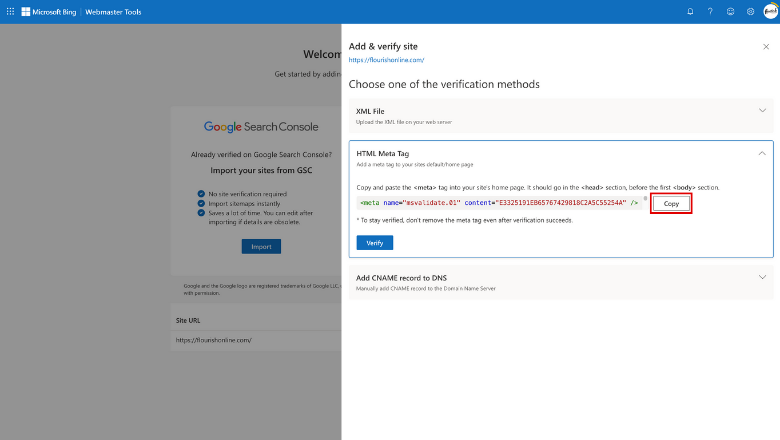
Select the second option, HTML Meta Tag and copy the code.
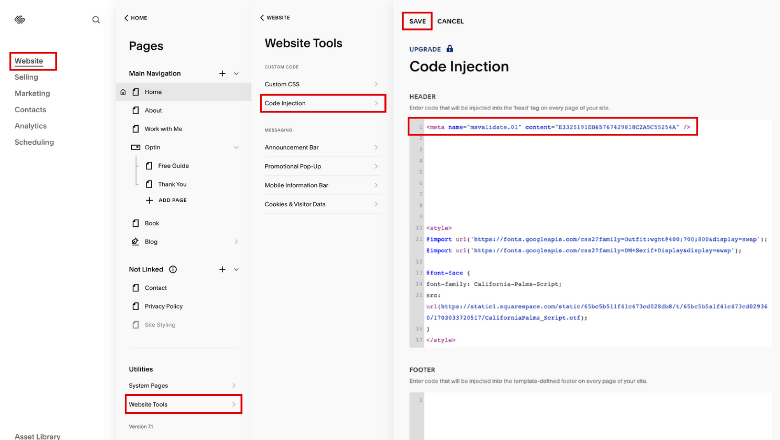
Within your Squarespace website go to Website Tools > Code Injection. And paste the code into the Header area and click Save.
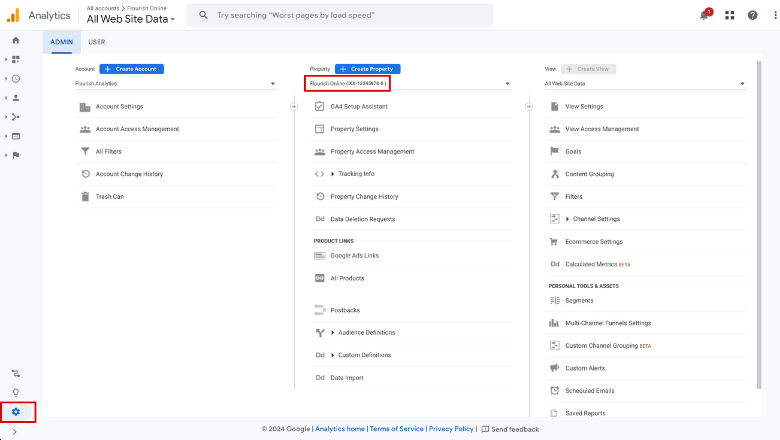
4. Connect to Google Analytics: Squarespace has built-in integration with Google Analytics, which you can use to track visits and other reporting on your site.
Once you have set up a Google Analytics account here. Within the dashboard navigate to Admin Settings (gear icon in the bottom left corner).
Copy your Google Analytics measurement ID (ie. XX-12345678-0), this is located under the Property column.
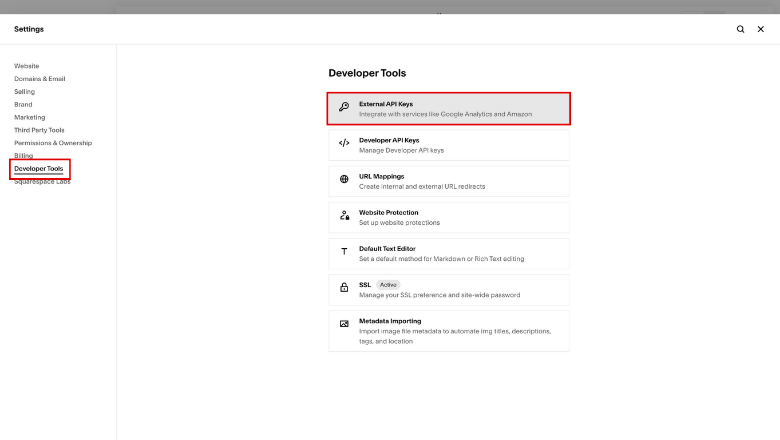
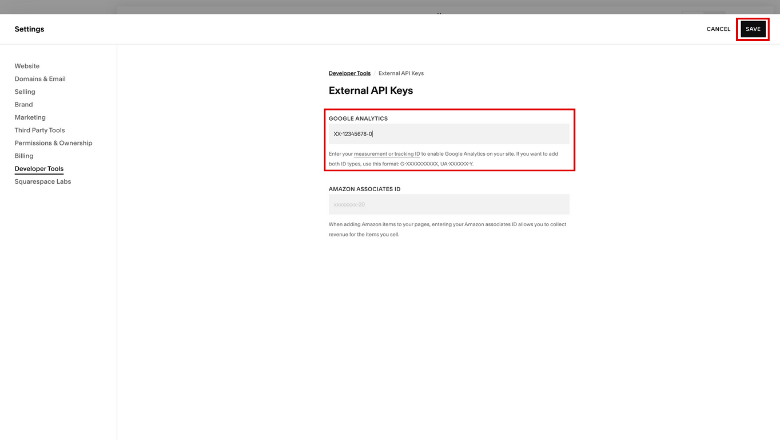
Within your Squarespace website go to Settings > Developer Tools > External API Keys and paste your measurement ID into the Google Analytics field and click Save.

Enable AMP - If you have a blog, be sure to enable AMP, which creates a streamlined version of your site for faster loading on mobile devices.
6. Celebrate!
Getting your website finished is a BIG deal - and you deserve to celebrate!
Looking for free ways to promote your website and show off your website to the big wide world? Don’t miss our guide to launching and generating excitement about your website launch.

Take our quiz now to discover your brand archetype so you can build the right strategic foundation for your online presence.


